
Coordinating kitchens and wardrobes: materials and detail
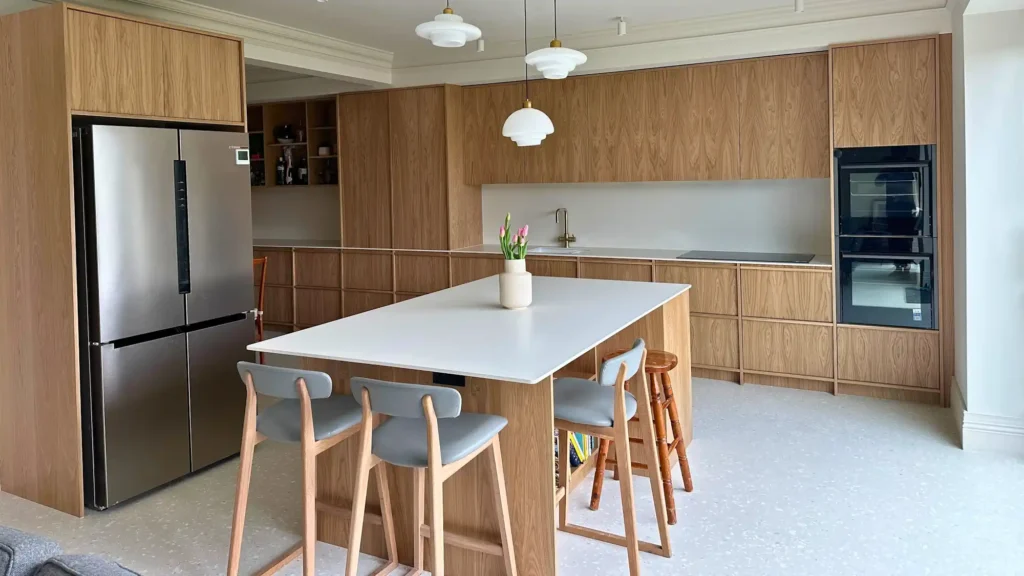
Bespoke kitchens and fitted wardrobes can share a material direction while serving very different routines. The kitchen needs working surfaces, appliances and accessible everyday storage; the bedroom needs an interior arranged around clothing and the available room. A coordinated home comes from connecting selected details while giving each furniture brief enough attention.
Establish what should connect the rooms
A repeated timber tone, handle finish or restrained front profile can link separate spaces. It is not necessary to use the same cabinet divisions or finish everywhere. Consider the light, room proportions and the way each elevation is seen.
Room photographs, material references and design discussions can help establish what should connect the spaces. Where a subtle timber tone or sheen needs closer comparison, a physical sample may be useful; agree a suitable review method for your project. Record the elements you want to repeat and where contrast is useful. If you are still defining the wider furniture brief, start with our guide to choosing custom furniture for your home.
Choose the finish, not just the colour
A coordinated interior needs more than matching colour names. Timber grain, surface texture, sheen and the shape of a front all affect how furniture sits beside flooring, worktops and painted walls. Decide which detail should repeat and which room should have its own character.
- Timber tone and grainDiscuss the timber or veneer appearance and the direction of the grain using suitable references, photographs or drawings. If adjacent fronts should read as one composition, agree their grain arrangement. A physical sample can help where a closer comparison is useful.
- Painted fronts and visible edgesConsider the front profile, painted colour and exposed edges together. Paint can provide a deliberate contrast to timber; the cabinet core and the painted front still need their own specifications.
- Sheen, touch and everyday careDiscuss the intended sheen and everyday care with JS DECO. Photographs, finish references and a phone or video conversation can help explain the options; physical samples can be considered where they add useful information. Care guidance should relate to the specified finish.
The Leeds oak kitchen above lets the timber character lead. The Cawthorne kitchen takes a different direction: RAL 2009 Traffic Orange and RAL 6003 Olive Green painted fronts sit alongside birch plywood cabinets and drawers. Its fronts are spray-painted moisture-resistant MDF. These are separate homes and specifications, showing two ways to develop a material palette rather than a matched kitchen-and-bedroom commission.
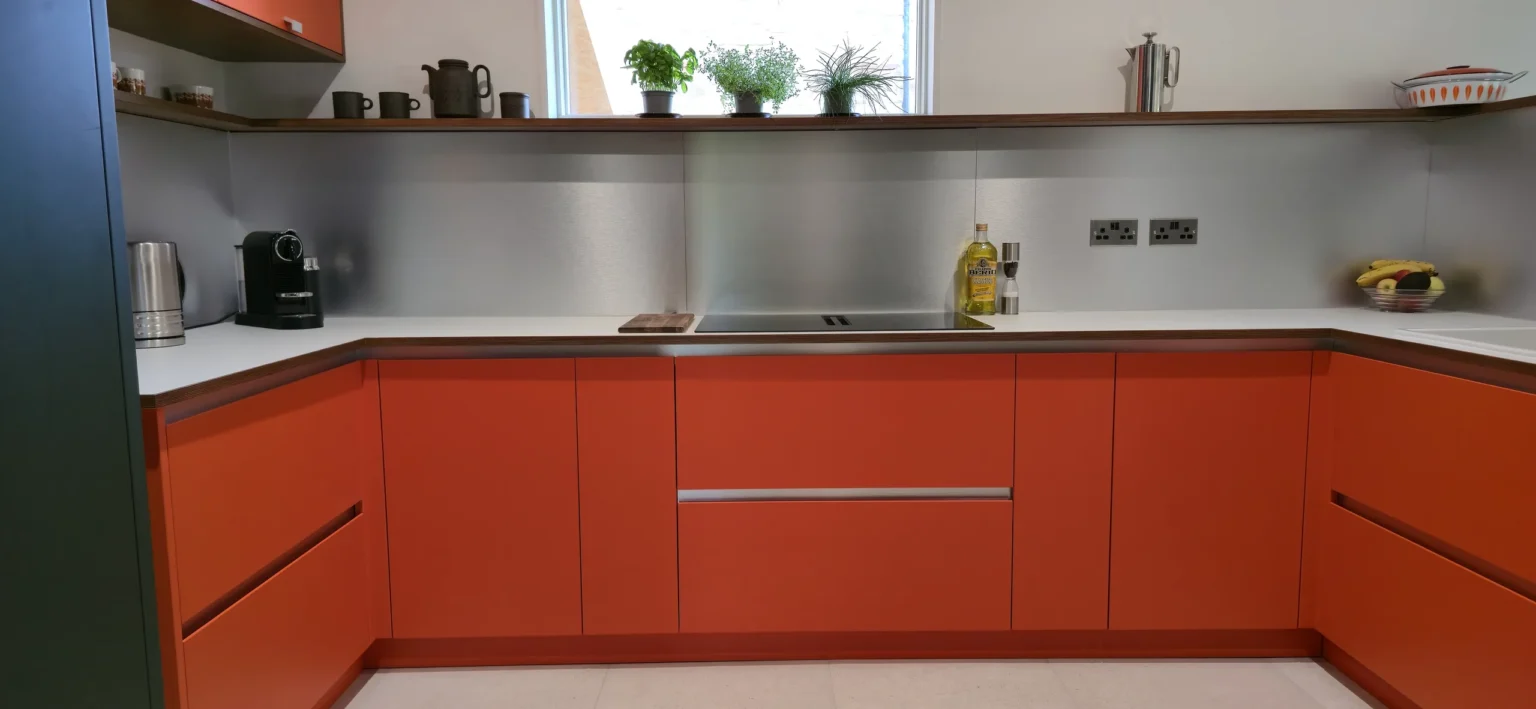
Our painted kitchen page explores that finish direction. For timber surfaces, the grain-matching guide explains the relationship between neighbouring fronts, while our lacquered and oiled plywood care guide helps you consider maintenance alongside appearance.
Give the kitchen a working brief
Plan food, cookware, appliances, bins and preparation surfaces before settling the front arrangement. The cabinet divisions should support those functions as well as the intended view from the rest of the room.
The Leeds project brings a concealed breakfast cabinet and substantial storage into a continuous oak composition. Open and closed views explain the function behind the appearance.
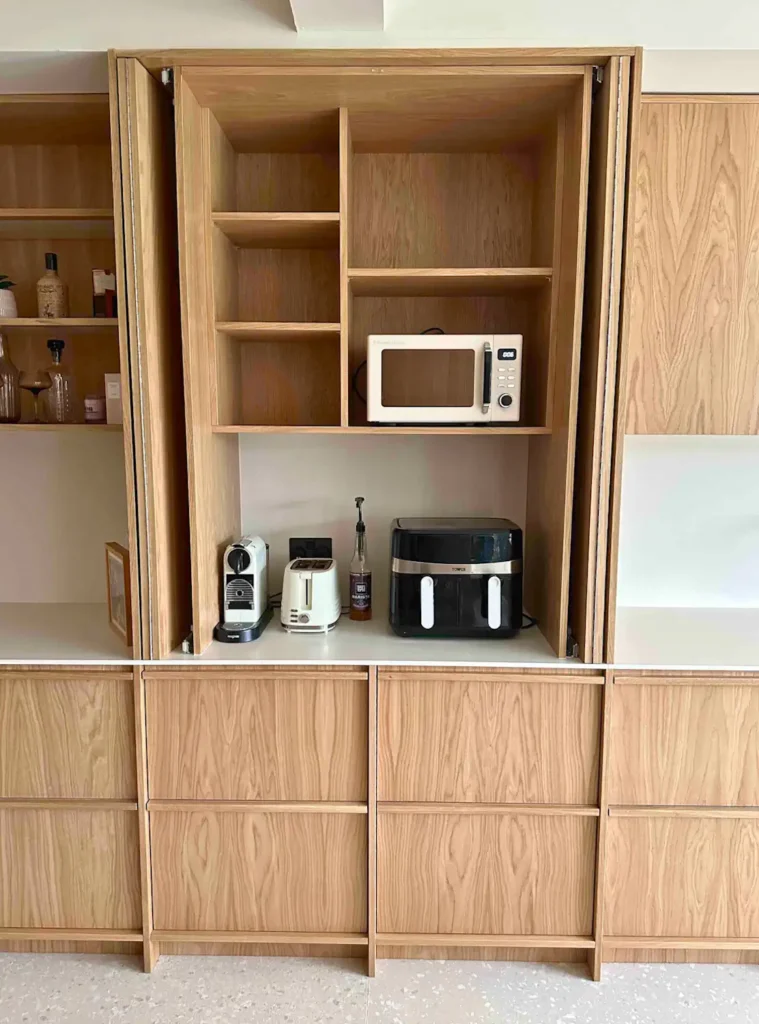
Our bespoke kitchen page explains the wider offer, and the storage guide focuses on the practical contents and access.
Plan the wardrobe interior independently
List long and short hanging, folded items, shoes and the need for drawers. Then compare how the doors open within the bedroom, including the bed and other furniture. Filling every corner with cabinetry is not the same as making every part easy to use.
The Normanton corner wardrobe shows storage across two walls with sliding doors. This historical project used Egger chipboard carcases and glass fronts. The arrangement shows how sliding openings and corner storage can work together; for a new cabinet commission, high-quality plywood is our preferred construction.
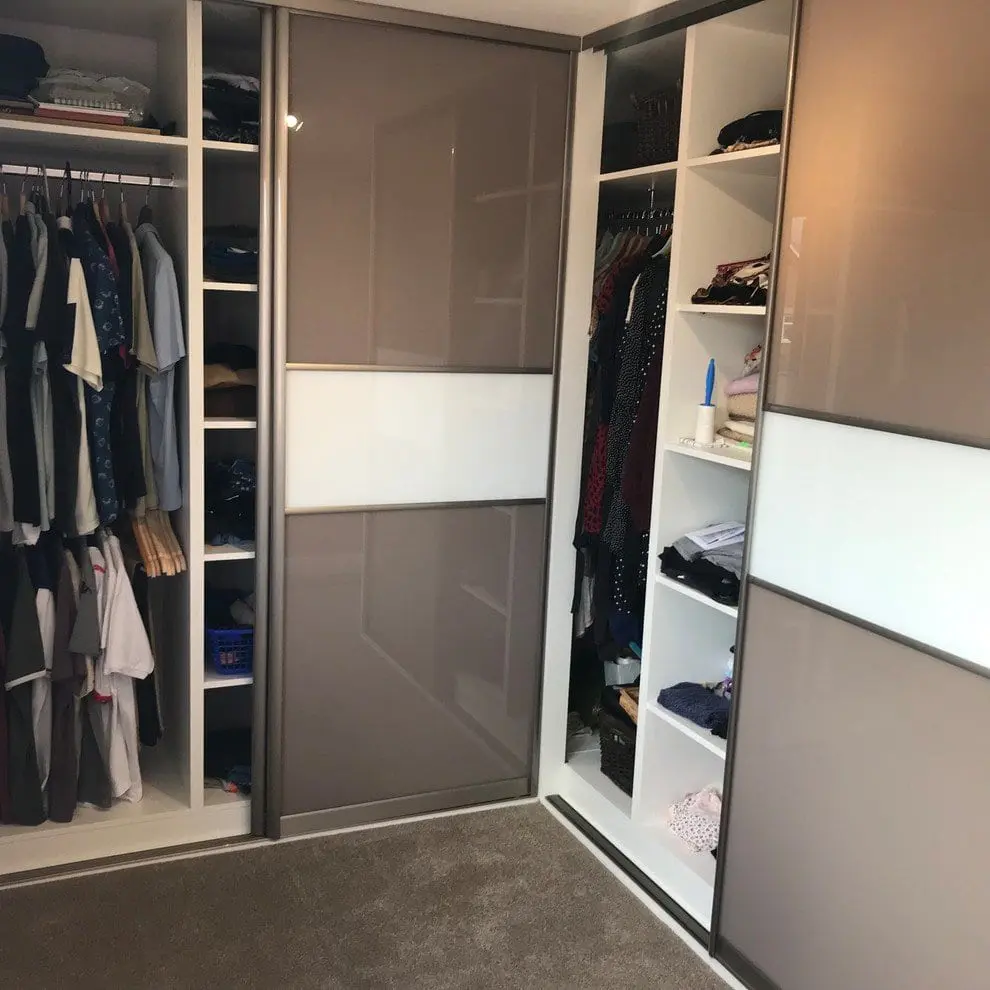
Explore bespoke wardrobes for the current room-specific discussion and the wardrobe planning guide for the interior decisions.
Specify construction and finish clearly
High-quality plywood is our preferred premium cabinet construction. The visible surface may be real wood veneer, paint or another selected finish. High-quality real-wood-veneered MDF can be considered for doors only alongside plywood carcases.
Craftsmanship becomes easier to judge when you look beyond the overall room view. Discuss how visible plywood edges meet the fronts, how grain runs across neighbouring timber doors and how handles or recessed grips fit the front arrangement. Where a detail matters to the design, ask to see it in a drawing, sample or workshop photograph.
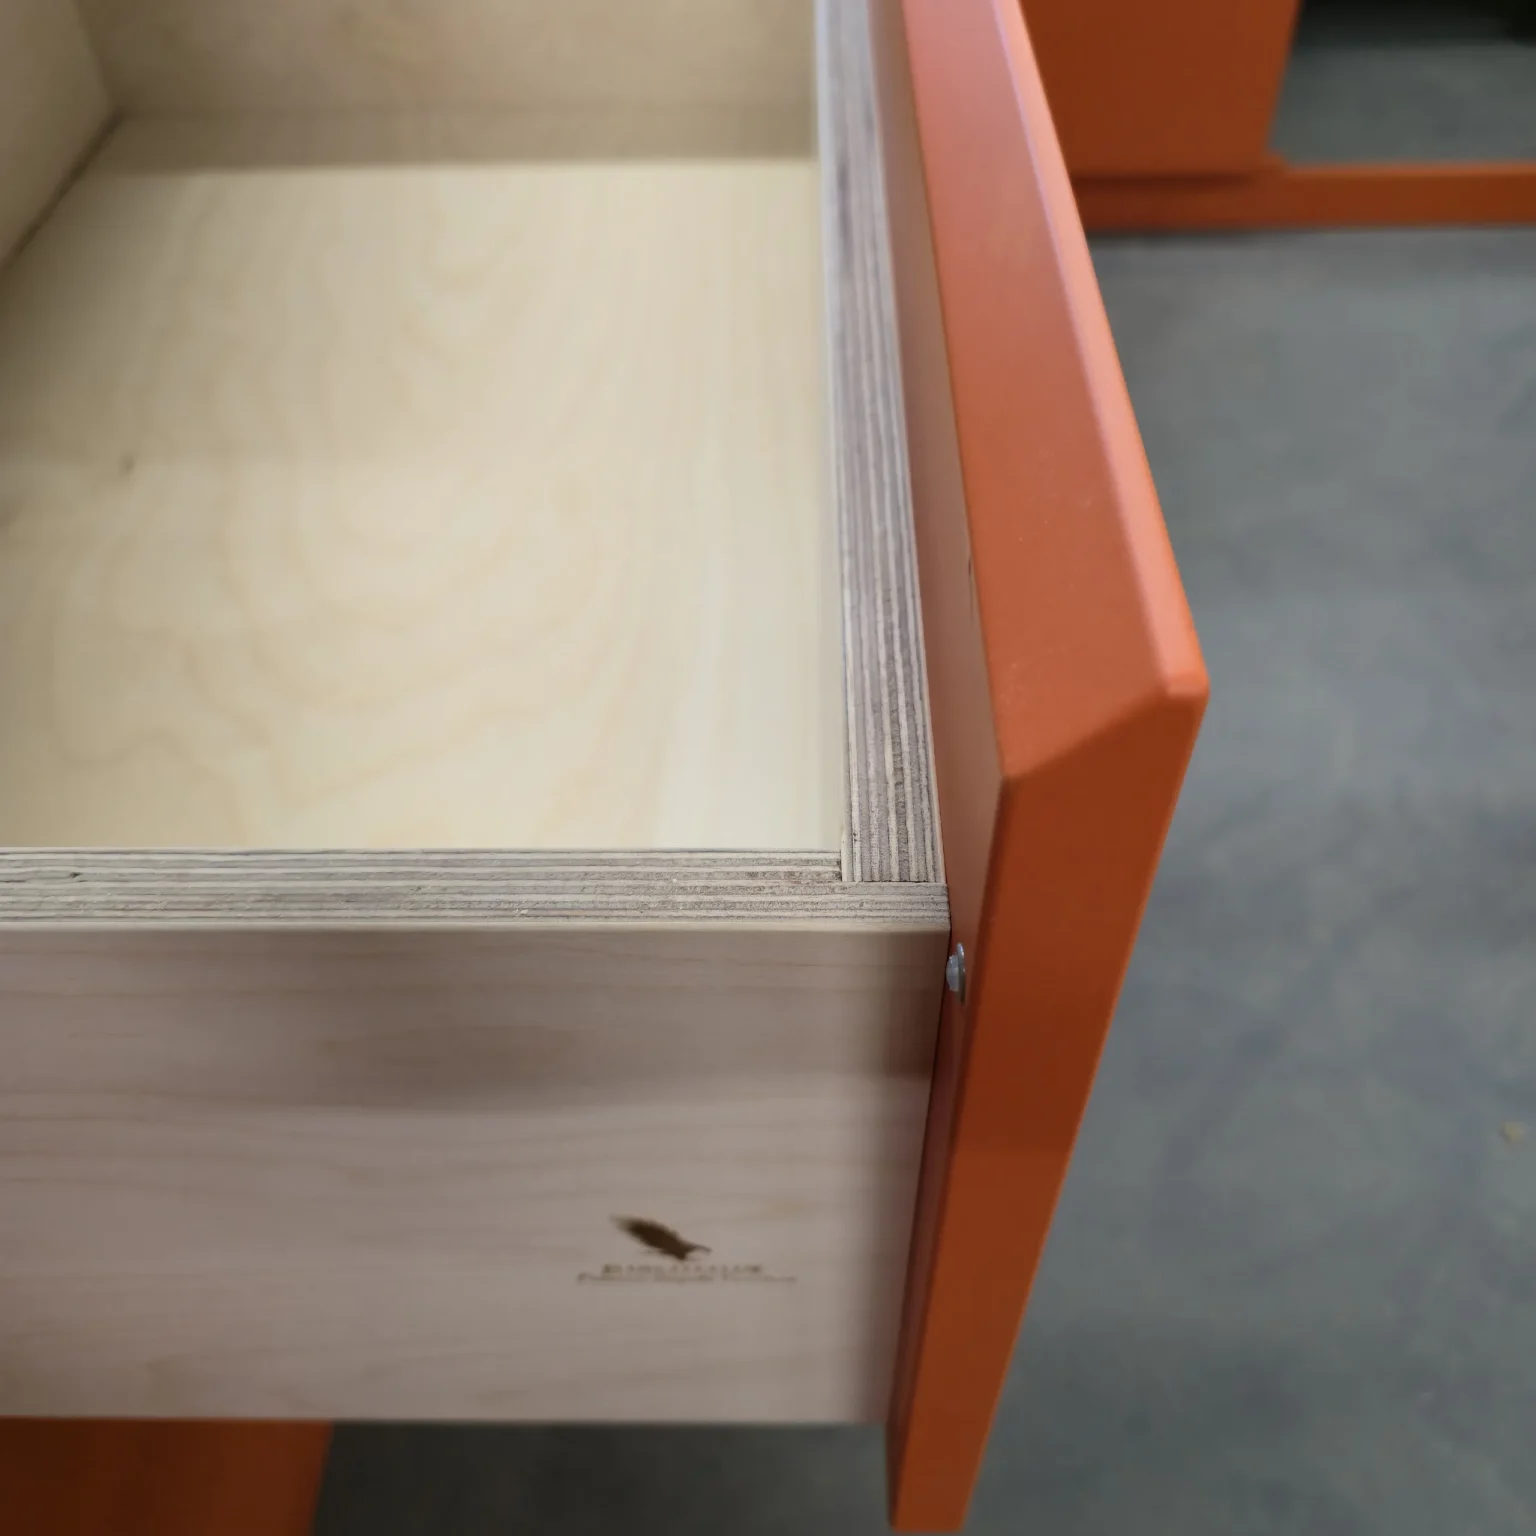
This detail shows why the inside and outside deserve separate decisions. The drawer box provides the storage structure; the front contributes colour and the opening detail. A finished-room photograph alone cannot explain every material or fitting, so the agreed specification should name them.
Agree the finish for your project
Finish decisions can be developed remotely using drawings, colour references, photographs and phone or video discussions. Agree with JS DECO which details need confirmation and whether physical samples would be useful. The review method should suit the materials and your project.
- Share the room contextShare room photographs, plans or references for flooring, worktops and wall colours where available. These help explain which elements should coordinate across the rooms and where you want contrast.
- Discuss colour and sheenAgree the colour reference and intended surface finish. Where subtle differences or the room lighting need closer assessment, discuss whether a physical sample would help and how best to review it.
- Confirm the visible detailsDrawings and detail photographs can explain grain direction, front profiles, exposed edges and handles or grips. Focus the review on the details that matter to your design and discuss care for the specified finish.
- Record the agreed specificationRecord the agreed colour and material references, finish and relevant drawings, including any sample used for approval. Confirm which rooms, delivery, fitting and measurement responsibilities are included.
Keep the design and manufacture decisions connected
Drawings and renders help explain proportions and the proposed appearance. Final manufacture also requires agreed dimensions, fittings and details. Review the decisions across the rooms without treating a colour match as the whole specification.
The collaboration guide explains how those decisions move between client, designer and maker. For environmental considerations, the sustainable furniture guide separates useful design aims from claims that need material evidence.
Questions about coordinated interiors
Do kitchen and wardrobe fronts need to match?
No. A repeated detail can create a relationship without identical furniture throughout the home.
Can every room use the same construction?
The preferred core and each component's specification should be discussed for its role. Do not infer the construction from a shared colour or veneer.
Can painted fronts be combined with plywood cabinetry?
Yes. The Cawthorne project combines birch plywood cabinets and drawers with painted moisture-resistant MDF fronts. That documented combination illustrates why the cabinet core, door substrate and visible finish should be specified separately.
Is a colour reference enough to approve a finish?
A colour reference helps identify the intended finish. Agree its code or name, sheen and relevant front details with JS DECO. These decisions can be reviewed remotely; whether a physical sample is useful depends on the finish and the project. Record the agreed specification.
Should the wardrobe be planned from the outside first?
Develop the visible elevation and storage interior together. The contents and door openings should inform the arrangement.
Bring the rooms and priorities together
Begin with the kitchen tasks, wardrobe contents and the colours or timber details you want to connect. Room photographs, plans or inspiration can help us discuss the direction remotely. Finishes can be developed during the design discussion, so you do not need every detail resolved before getting in touch.