
Choosing your kitchen style: materials, proportions and everyday use
Choosing a kitchen style is easier when you look beyond names such as modern, traditional or farmhouse. The finished appearance comes from the door shape, materials, colours, handles, worktops and the way the furniture fits your room.
This guide helps you compare those choices, recognise what you like in real kitchens and turn inspiration into a practical design brief. The JS DECO projects below show different approaches; each example explains a specific decision rather than suggesting that one style suits every home.
Start with your room and the way you use it
Look at the features that will remain: windows, ceiling height, floor, adjoining rooms and any exposed brick or timber. Decide whether the kitchen should blend into that setting or introduce a deliberate contrast. A period home can accommodate contemporary cabinetry, just as a newer home can suit painted Shaker doors.
Then think about everyday use. Do you cook alone or together, eat at the kitchen table, need a clear place for homework, or want appliances hidden when the room is used for relaxing? These answers influence the layout and storage as much as the appearance.
- KeepIdentify room features and furniture you want the kitchen to work with.
- ImproveName the storage, preparation or circulation problems you want to solve.
- PreferCollect a few examples and note the precise details you like.
A useful starting point is “warm oak, simple doors and concealed storage” rather than just “modern”. Our bespoke kitchen overview explains how the furniture can be developed around the room and your priorities.
Compare the main kitchen styles through their details
Style names overlap. Use the following descriptions as a way to compare choices, rather than a rulebook. A successful kitchen can combine influences while keeping its proportions and palette consistent.
Contemporary: simple fronts and a controlled palette
Flat doors, clean cabinet lines and restrained detailing can give a contemporary kitchen a calm appearance. Handles may be discreet or deliberately visible; modern does not automatically mean handleless, glossy or white.
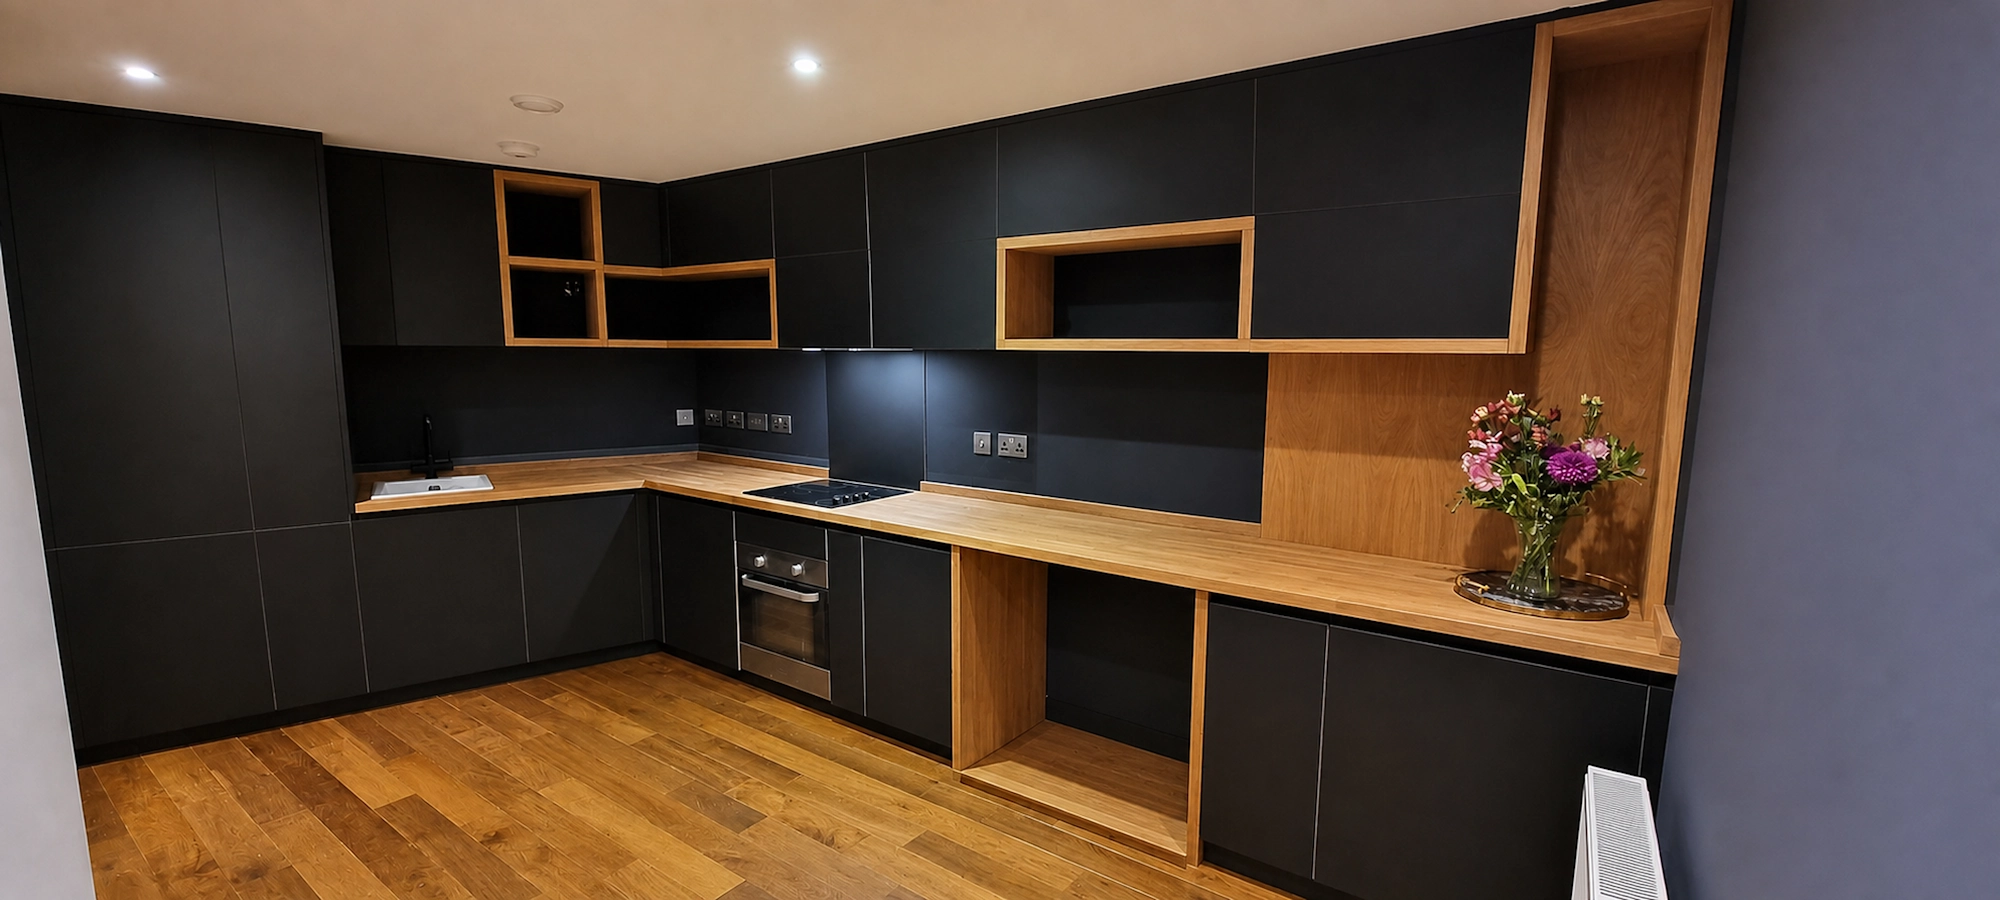
The Lambarde Square apartment kitchen pairs dark FENIX fronts with solid oak surfaces and open shelves. The timber adds warmth without changing the simple door arrangement. For the material options behind this look, explore our FENIX kitchen guide.
Traditional: framed doors and considered detail
Framed doors, visible handles, glazed cupboards and shaped details can create a traditional appearance. The degree of decoration matters: a simple Shaker door feels different from an ornate raised-panel design.
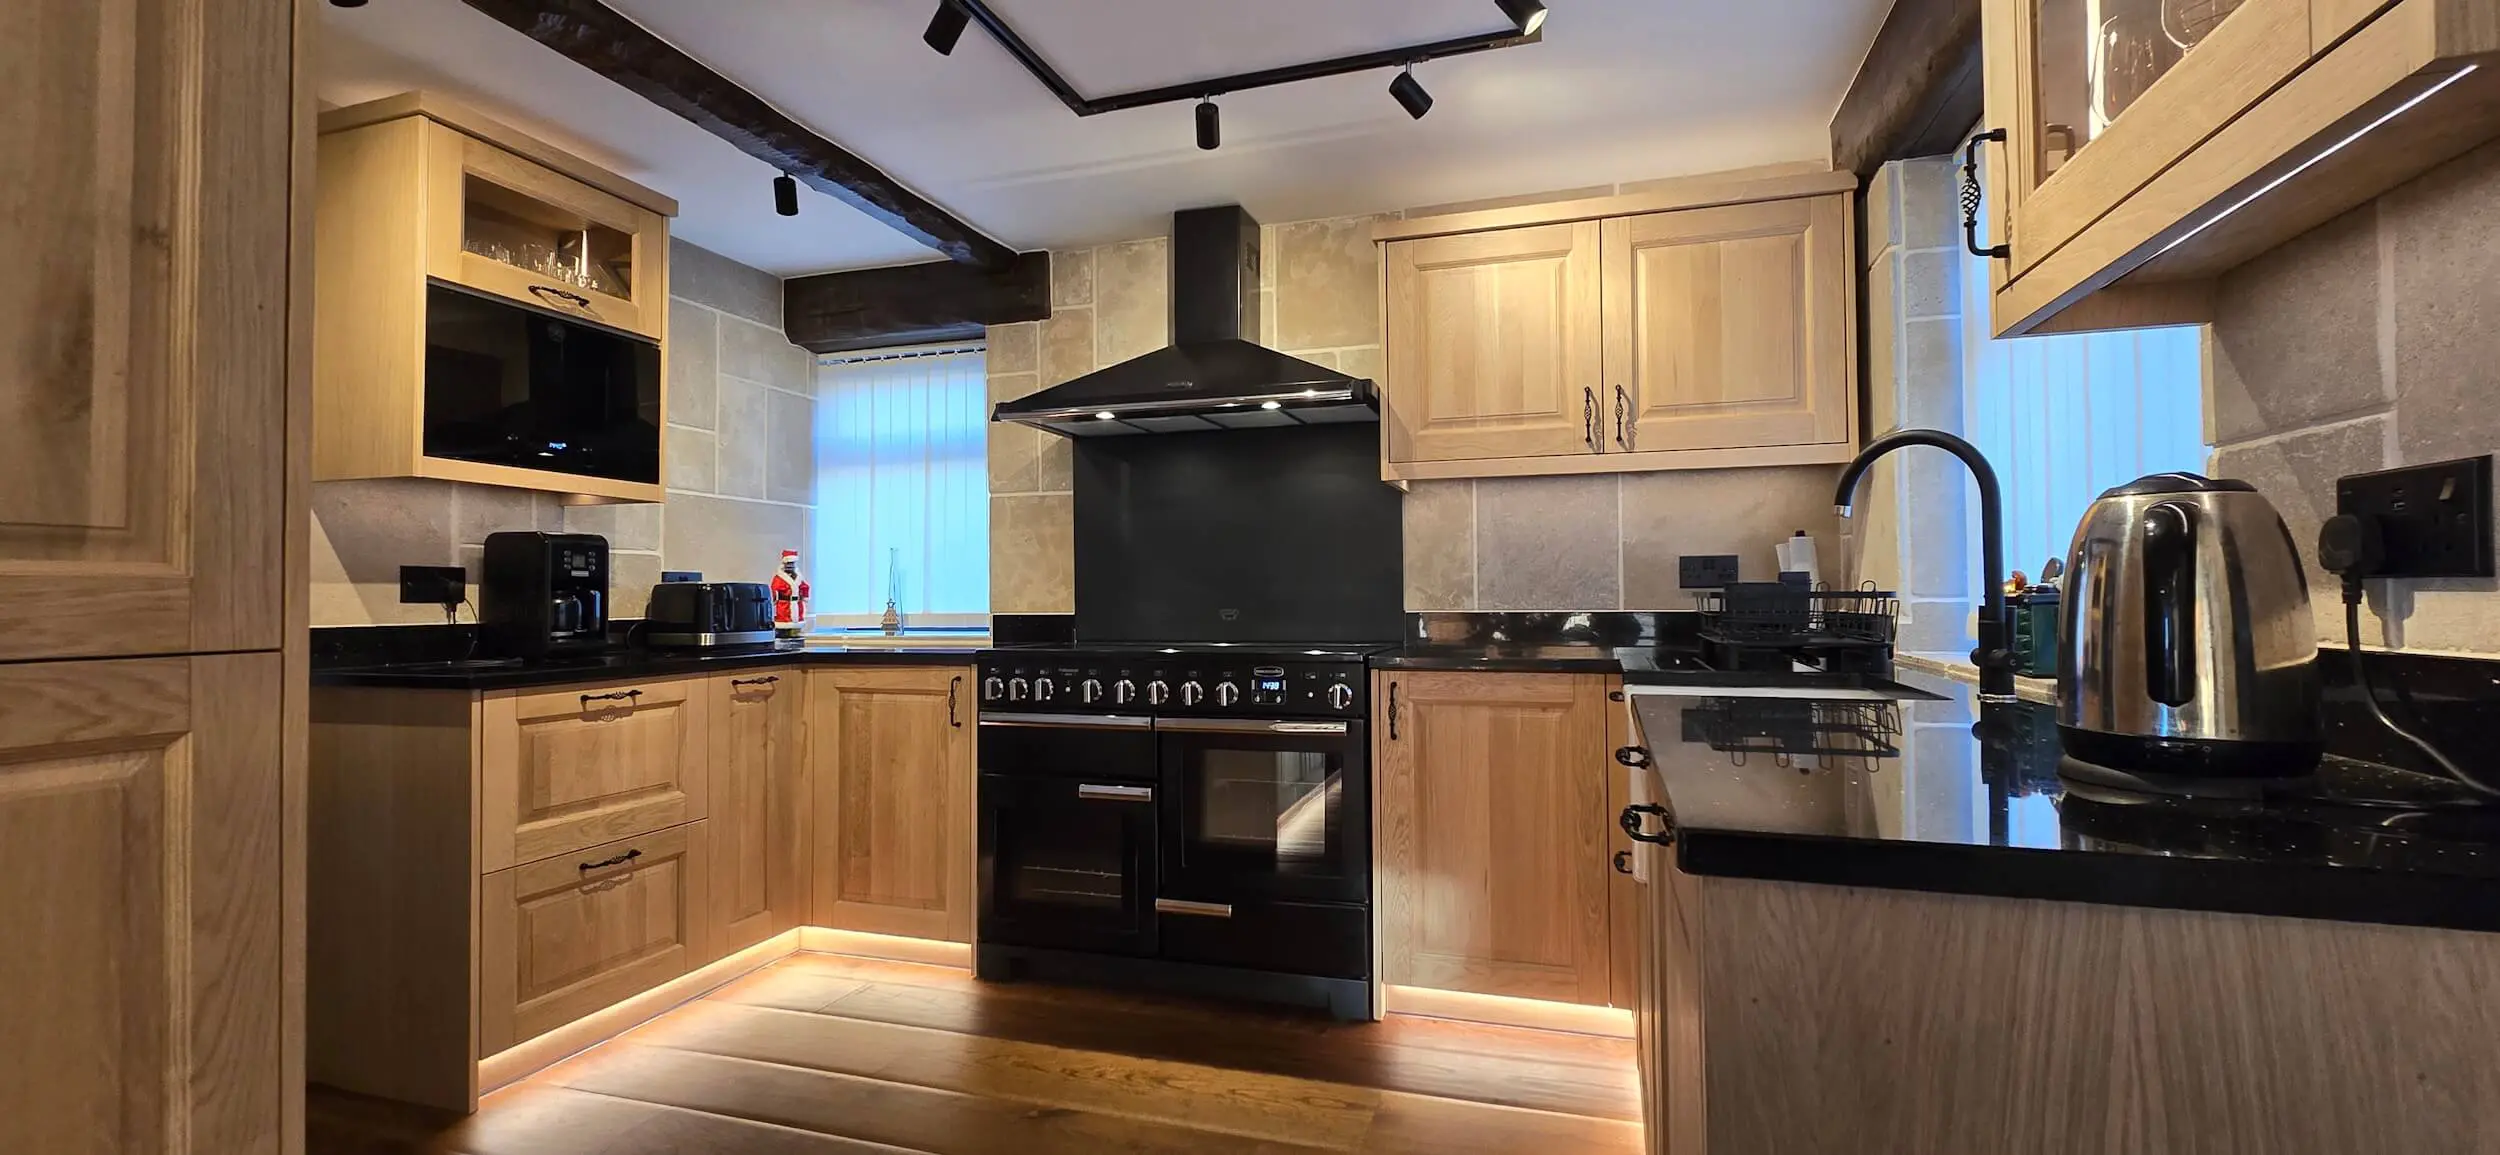
In our Huddersfield oak kitchen, panelled fronts, a range cooker and black granite sit within a room with exposed beams. Painted doors provide another route to traditional character; our hand-painted kitchen page explains that option. Traditional cabinetry is not restricted to large rooms—scale the detailing to the space.
Farmhouse and rustic: warmth, texture and a lived-in setting
Farmhouse kitchens often combine framed or Shaker doors with timber accents, practical work surfaces and a welcoming place to gather. Rustic styling places more emphasis on visible texture and natural variation. Neither requires decorative clutter or every surface to be timber.
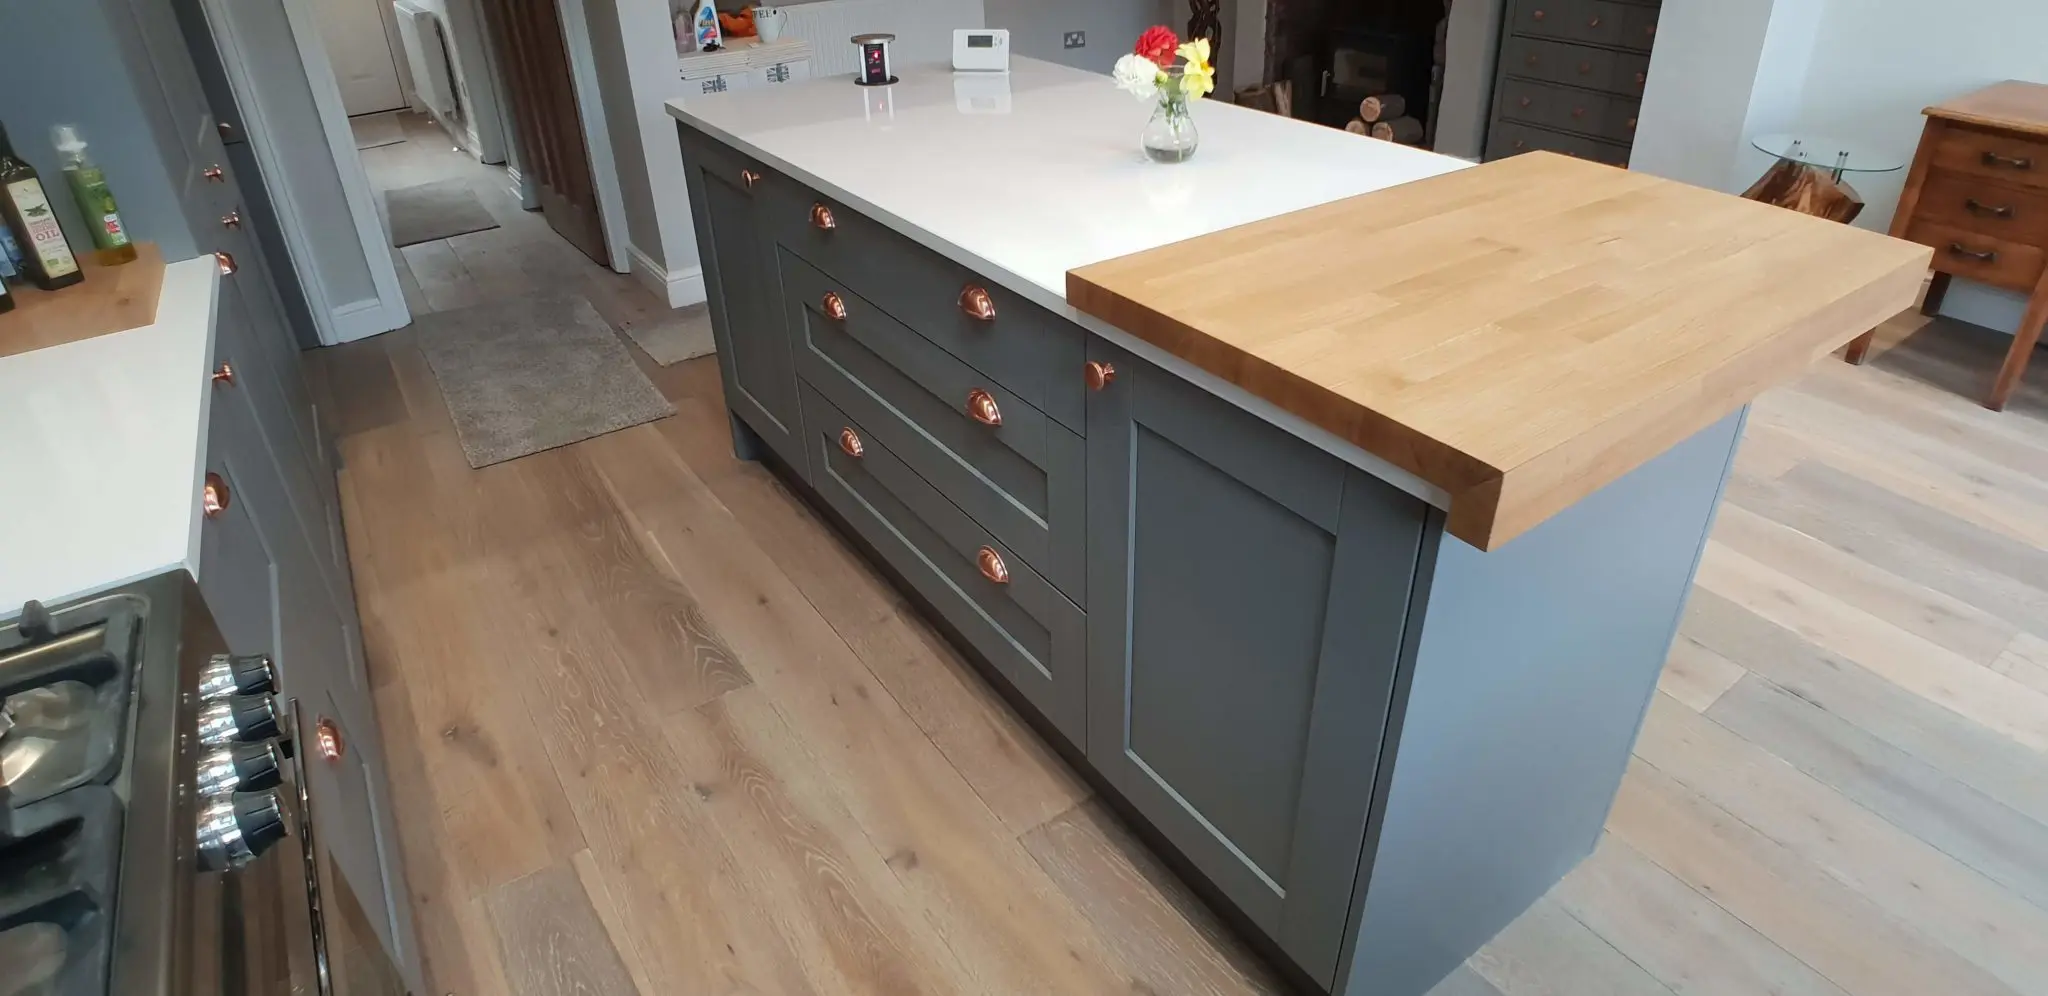
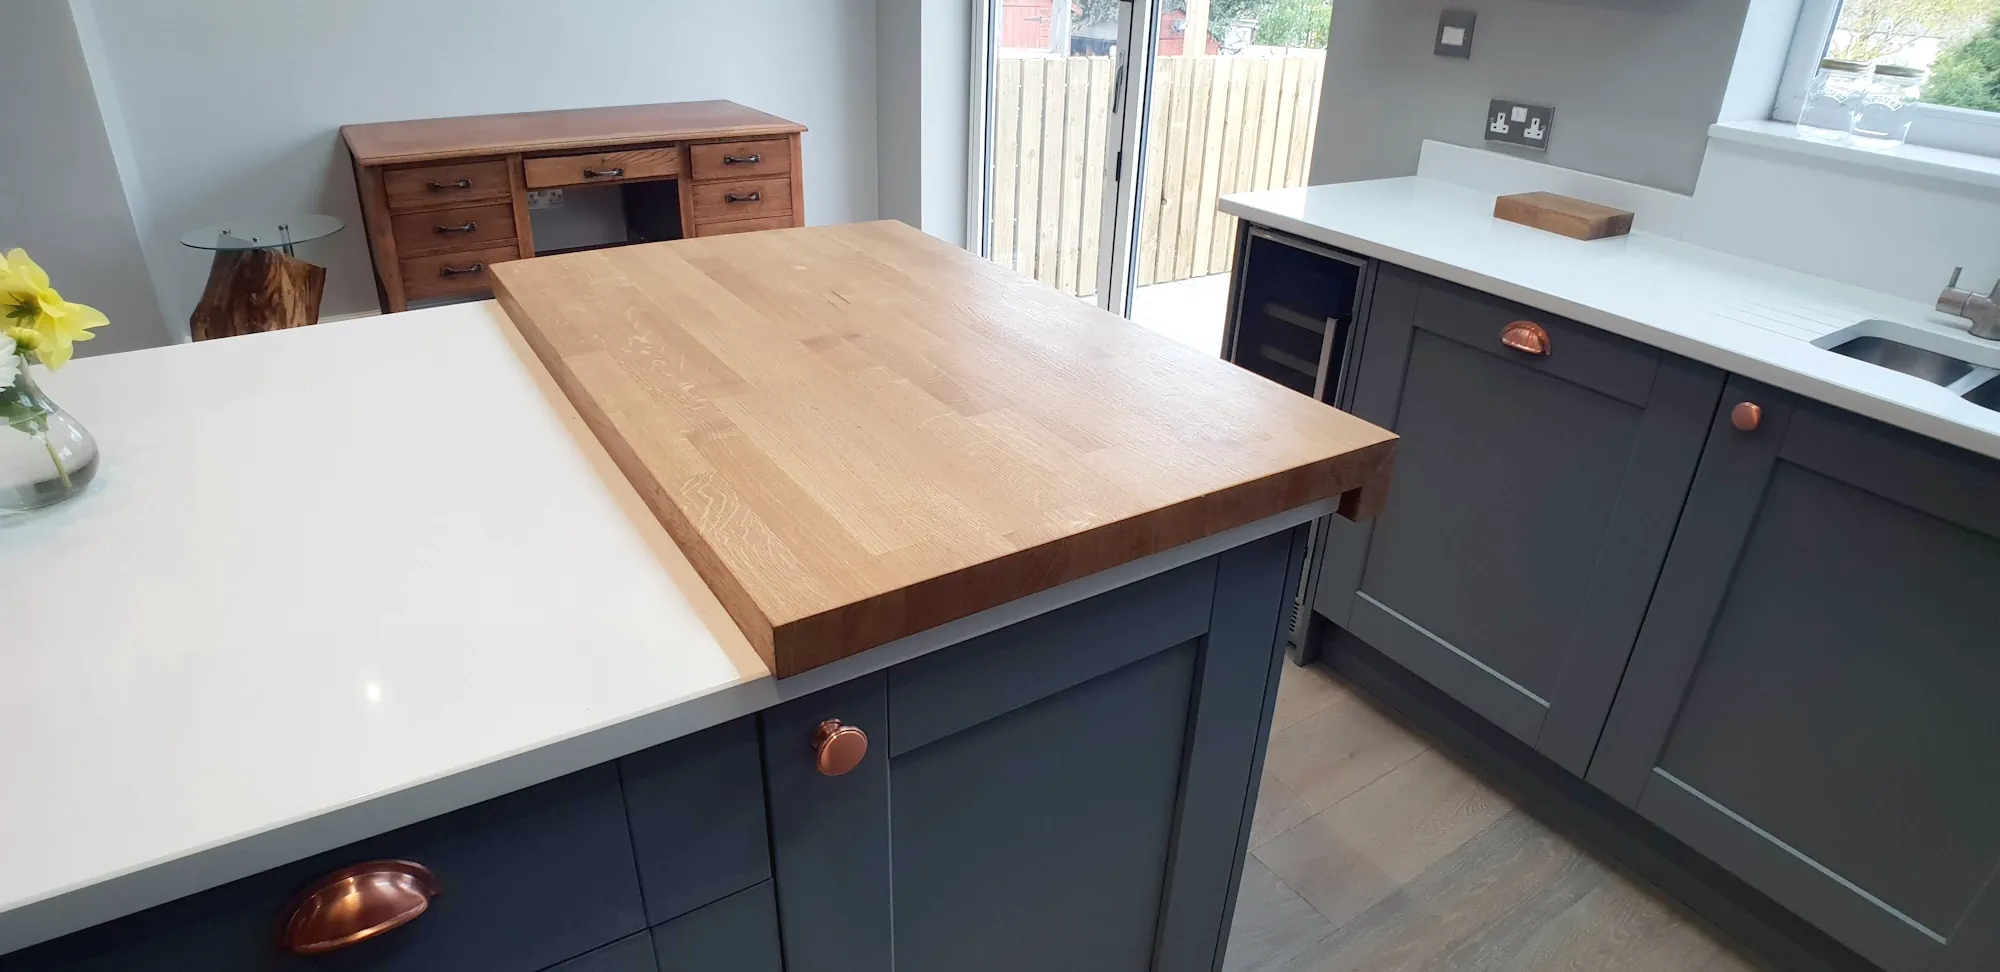
The opening Pudsey example shows painted oak doors, copper handles and a substantial oak island detail. Those ingredients can inform a farmhouse direction, while the white quartz and integrated storage keep the working areas practical. Shelves are useful where you enjoy display and easy access; closed cupboards offer a quieter alternative.
Scandinavian and Japandi: simple forms with visible timber
Natural timber, restrained colour and uncomplicated forms can create a Scandinavian or Japandi-inspired kitchen. The aim is a balanced room, with enough storage to support the uncluttered appearance you want.
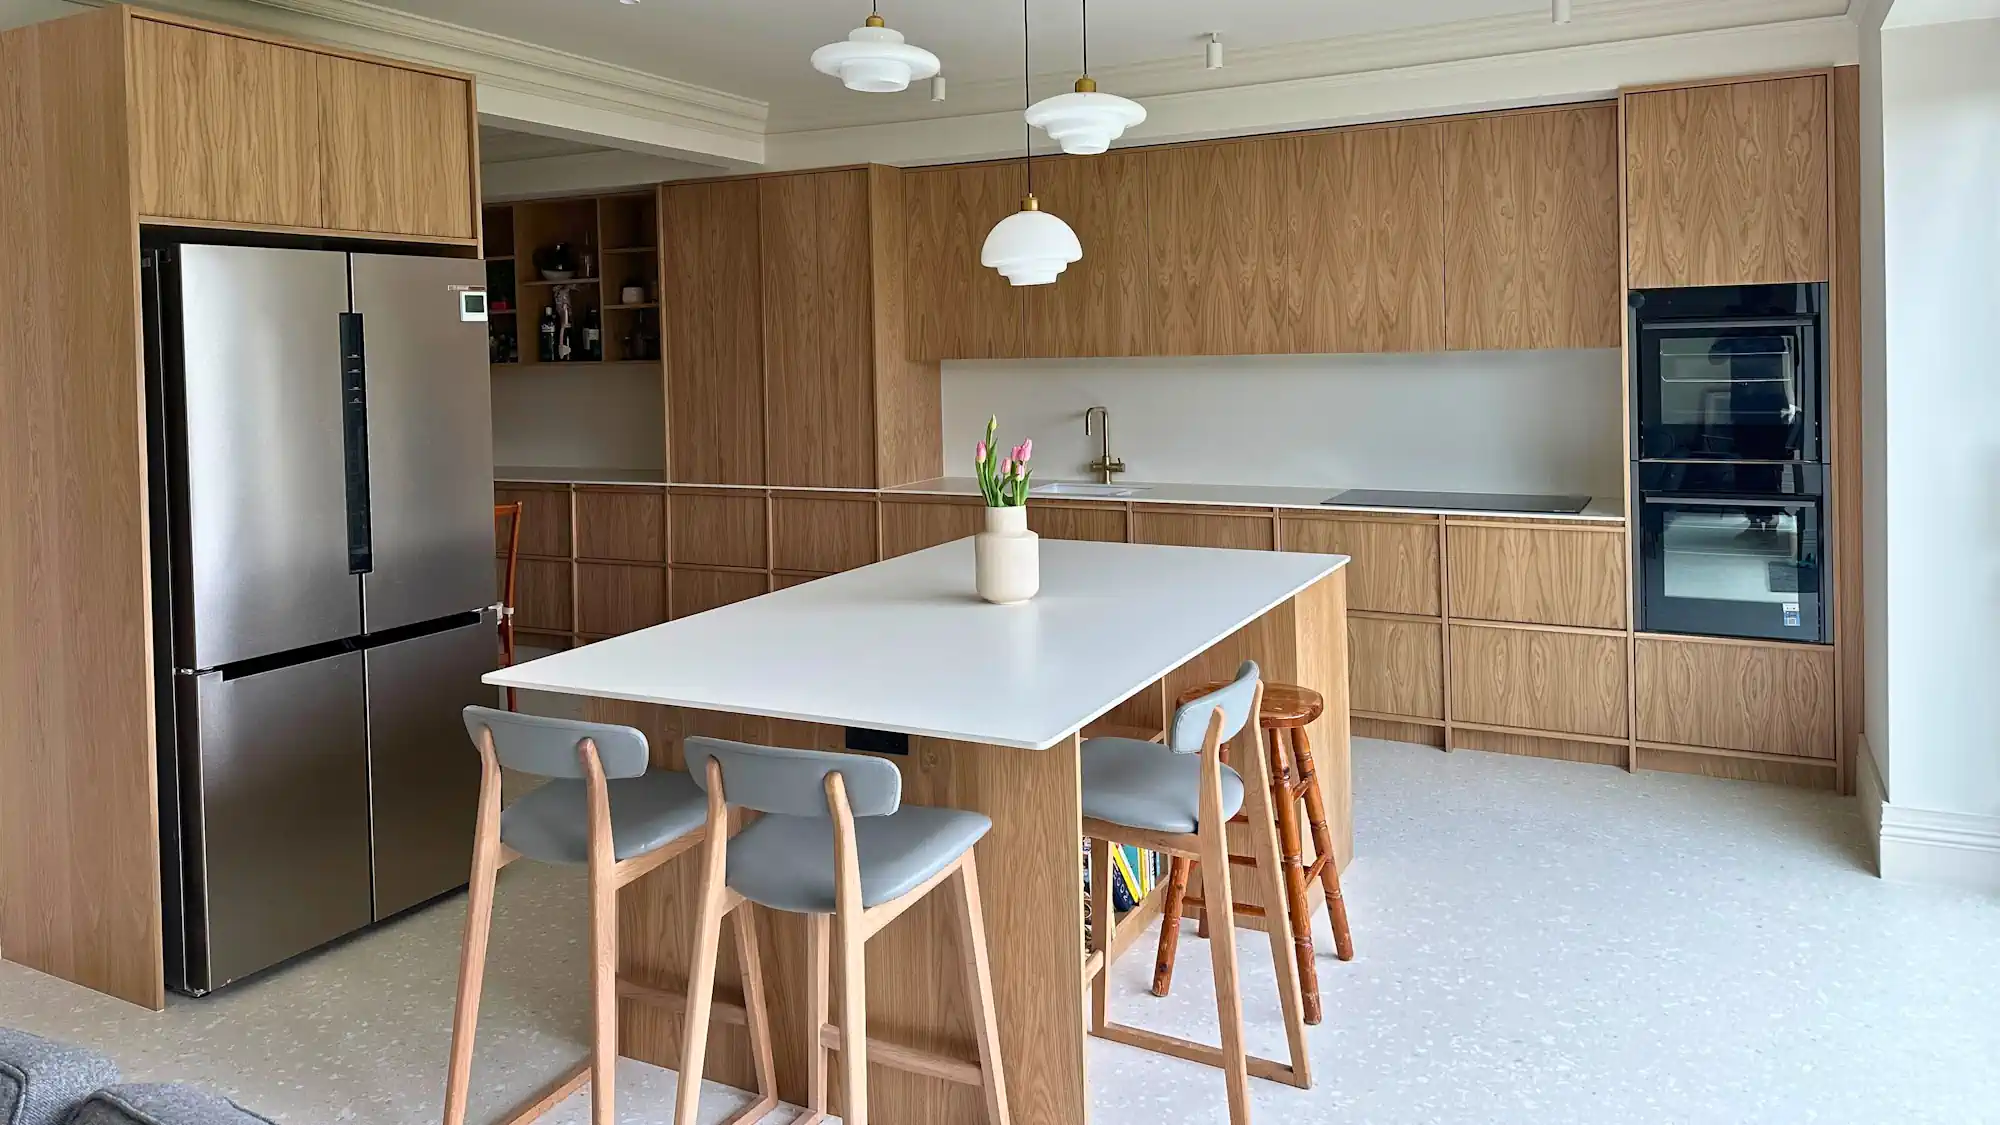
Our Leeds Japandi kitchen brings oak cabinetry, pale surfaces and a separate island together. Look at the relationship between the tall units, working run and island, as well as the timber itself. Where adjacent fronts form a large visible surface, grain planning can be part of the design discussion.
Industrial: contrast, robust textures and visible structure
An industrial direction can draw on exposed brick, metal, darker tones and structural details. Choose the room features that already support it, then balance them with cabinetry and work surfaces that are comfortable to use. You do not need to reproduce a warehouse interior or expose services simply to achieve the look.
Metal finishes and darker fronts can introduce this influence in a smaller room too. If you prefer a stronger stone-like surface, compare the appearance and specification of ceramic-faced kitchen options; a surface choice alone does not define the style.
A mixed or transitional kitchen
You can bring traditional and contemporary details together: simple Shaker doors with restrained worktops, or flat fronts with timber shelves and visible handles. Choose a main direction and repeat a small number of colours and materials so that the kitchen reads as one design.
Choose the materials, colours and handles together
Separate the appearance of the fronts from the construction behind them. Cabinet boxes, doors, end panels and worktops can use different materials. Solid timber, real wood veneer, painted surfaces and decorative laminates each offer a different visual result; none should be inferred from a style label or photograph alone.
- Door shape
- Flat, framed or more decorative fronts establish the main lines.
- Colour and timber
- Decide what leads the palette and where contrast is useful.
- Worktop and splashback
- Compare them beside the actual door sample.
- Handles
- Check appearance, position and comfortable everyday opening.
- Care
- Understand the cleaning and maintenance needs of the specified finish.
A neutral palette can be versatile, but it is not compulsory. In Cawthorne, Traffic Orange kitchen fronts and an Olive Green pantry work with pale worktops and silver-finish splashbacks. The project uses painted MDF fronts on birch plywood cabinets: colour and cabinet construction are separate decisions.
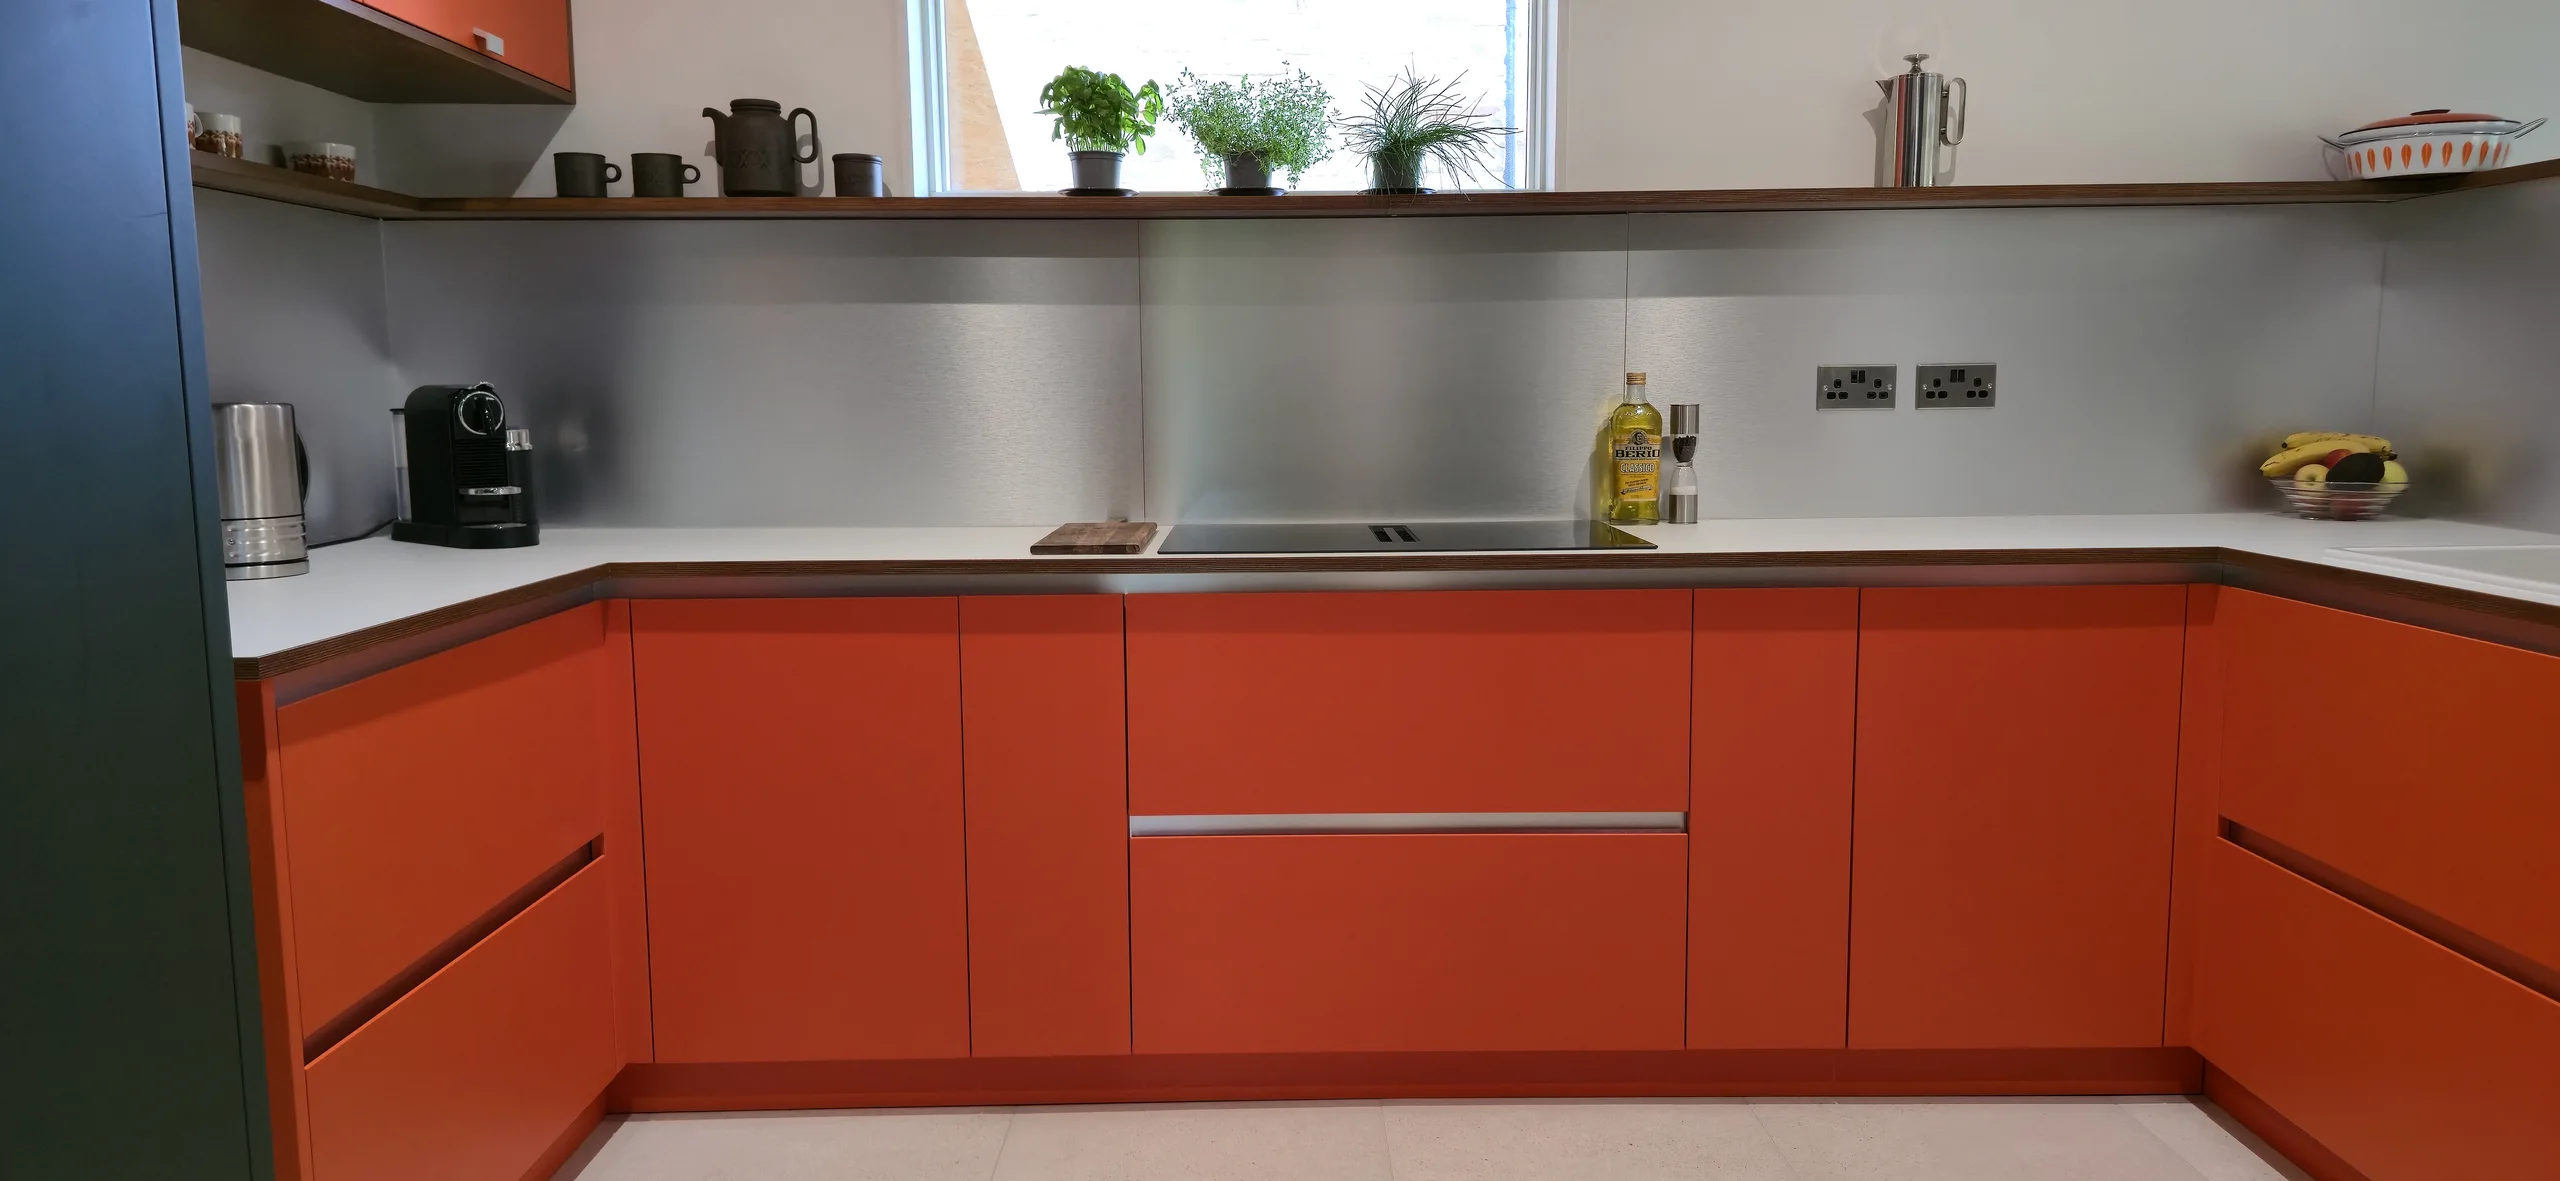
Where physical samples are useful, agree how the palette will be reviewed in your daylight and evening lighting. Drawings, photographs and digital references can help establish the direction remotely; the main combinations are then developed together rather than treating the door colour, handle and worktop as unrelated decisions. A small reference palette is usually more useful than a large collection of unrelated inspiration photographs.
Make the style work through layout, storage and lighting
Plan movement and preparation first
Think about the route between storage, washing, preparation and cooking, including where more than one person will work. The sink, hob and fridge can form a useful planning triangle, but it is not a universal layout rule. Door openings, appliance clearances and usable worktop space need their own consideration.
An island should serve a purpose and leave room to move and open cupboards comfortably. In a compact kitchen, a well-planned perimeter run may provide a better result. Confirm appliance dimensions and installation requirements before cabinet sizes are finalised.
Give everyday items a place
Choose drawers, shelves and taller storage around what you actually keep. Pans near cooking, dishes near the dishwasher and a place for small appliances can support both convenience and the appearance of the room. Decide which items you want to display and which should be behind doors.
Coordinate lighting with the furniture
Plan general room lighting, task lighting over preparation areas and any display or decorative lighting together. Lighting changes how colour and texture are seen; consider cable routes, switches and fittings before manufacture. Pendants can add character, while lighting beneath cupboards can help the working surface.
Set budget priorities without losing the overall look
A style label does not establish the price of a kitchen. Dimensions, door construction, finishes, hardware, worktops, appliances and installation scope all affect the quotation. Agree what is included so that different proposals can be compared fairly.
Identify two or three features that matter most—perhaps painted oak doors, a timber island detail or a particular worktop. Keep other choices simpler where that supports the same palette. It is more useful to discuss a coherent specification than to assume that every premium detail is needed everywhere.
Turn your inspiration into a simple design brief
- Choose a directionDescribe the feeling and details you want, not only the style name.
- Select a few examplesExplain what you like about each kitchen and what you would change.
- Show the roomShare photographs, available measurements or drawings and features that will remain.
- List practical prioritiesStorage, appliances, preparation, seating and everyday use.
- Agree the scopeMaterials to explore, indicative budget, project stage and desired timescale.
You do not need a finished design to start. A clear brief makes it easier to assess how the proportions, finishes and layout work together, then refine the details with the designer.
Frequently asked questions
How do I choose between a modern and a traditional kitchen?
Compare the details you enjoy rather than choosing from a label alone. Flat fronts and restrained lines tend towards a modern appearance; framed doors, decorative mouldings and visible handles create a more traditional one. Look at complete rooms and consider how each would fit your home and daily routine.
Is a Shaker kitchen always traditional?
No. A Shaker door has a frame and recessed centre panel, but its overall appearance also depends on the frame proportions, colour, handles, worktops and surrounding room. A simple Shaker design can bridge traditional and contemporary interiors.
Can I combine two kitchen styles?
Yes. Choose one main direction, then introduce a few compatible details from another. For example, painted Shaker doors can work with simple worktops and modern appliances. Repeating a limited palette helps the parts feel connected.
Which kitchen style works best in a small room?
There is no single answer. Cabinet proportions, useful storage, lighting and clear circulation matter more than the style label. Flat fronts may feel visually quiet, while a restrained Shaker design can also work well. An island should be included only where the room allows comfortable movement and use.
Does a timber-looking kitchen have to be made entirely from solid wood?
No. Solid timber, real wood veneer and decorative wood-effect surfaces are different options. Ask what is specified for the cabinet boxes, doors, visible panels and worktops; a photograph of the fronts does not establish the construction of the whole kitchen.
Do I need to settle on a style before asking for design help?
A few preferences are enough to begin. Bring room photographs or a plan, two or three useful examples, and the features you like about them. Storage needs, appliances, project scope and an indicative budget help turn those preferences into a workable design.
Bring the look and the layout together
The most useful next step is to test your preferred details against the actual room. A design discussion can turn separate ideas for doors, colours and storage into one kitchen that works as a whole.
Understand the choices behind a bespoke kitchen
Explore how room-specific design, construction and material decisions shape the finished furniture, so your preferred style has a practical foundation.
Read the bespoke furniture guide